Category: How to

  • How to Connect Your PS4 Controller to PS4 & PC: The Ultimate Guide

    How to Connect Your PS4 Controller to PS4 & PC: The Ultimate Guide

    🎮 Get Started: Connect Your PS4 Controller to PS4 & PC

    The DualShock 4 is a top-tier controller.1 You can use it on your PS4 or leverage its power for PC gaming. Learning how to connect PS4 controller is simple, but the steps vary slightly depending on your device.

    Follow this ultimate guide to connect your controller to either system quickly and start playing!


    Part 1: Connecting the DualShock 4 to Your PlayStation 4

    Connecting to the PS4 is the fastest and easiest method. You only need a simple micro-USB cable.

    1.1: Standard USB Connection (Initial Pairing)

    • You Will Need: A micro-USB cable (the same type used for charging the controller).

    Step Action Key Outcome
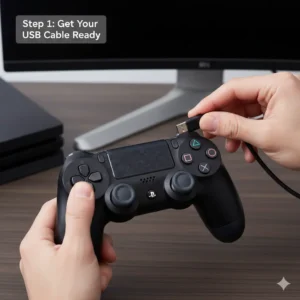
    1. Plug the micro-USB cable into the top port of your DualShock 4 controller. Controller is ready to charge/pair.
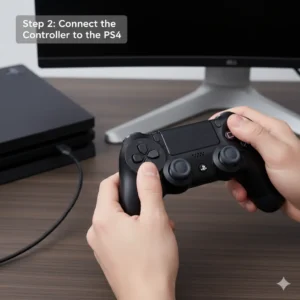
    2. Plug the other end (USB-A) into a USB port on the front of your PS4 console. The controller establishes a physical link.
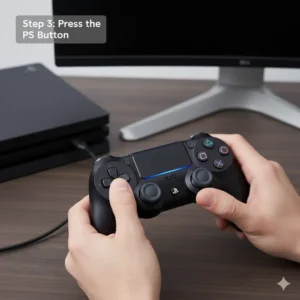
    3. Press the large PlayStation (PS) button in the center of the controller. The light bar will glow a solid color.

    Result: The controller is now paired, charged, and ready to use! You can now unplug the cable for wireless play.

    1.2: Syncing an Existing Controller (Wireless)

    If your controller is already paired but powered off, simply press and hold the PS button for a few seconds. It will automatically reconnect to your console.


    Part 2: Connecting the PS4 Controller to Your PC

    Using a DualShock 4 on a PC is an excellent choice for better compatibility and control. You have two main methods: Wired (USB) or Wireless (Bluetooth).

    2.1: Wired Connection (Easiest Method)

    This is the fastest way to get started and requires no extra software for most games.

    • Simply plug the micro-USB cable from the controller directly into a USB port on your PC.

    • Your PC will recognize the controller automatically as an input device.

    Pro Tip: This method works perfectly with Steam, which has built-in support for the DualShock 4.3

    2.2: Wireless Connection (Using Bluetooth)

    For a truly wireless PC gaming experience, follow these steps.

    Step 1: Put the Controller into Pairing Mode

    You need to force the controller to broadcast its Bluetooth signal:

    1. Press and hold the Share button.

    2. While holding Share, press and hold the PS button.

    3. Keep holding both until the light bar on the back of the controller begins to flash a rapid, pulsing white light. This means it is in pairing mode.

    Step 2: Connect via PC Settings (Windows)

    1. Open your PC’s Settings.

    2. Go to Devices $\rightarrow$ Bluetooth & other devices.

    3. Click Add Bluetooth or other device.

    4. Select Bluetooth.

    5. Look for a device named “Wireless Controller” (or sometimes “Game Pad”) and click it to connect.

    Result: The light bar will turn to a solid blue once connected.

    2.3: Recommended Software for PC

    While the controller works immediately, using a tool can improve compatibility, especially with non-Steam games:

    • Steam Big Picture Mode: Steam offers the best native support. Launch a game through Steam’s Big Picture mode, and it will configure the DualShock 4 for you.

    • DS4Windows: This popular third-party tool makes your PC believe the PS4 controller is an Xbox 360 controller.4 This dramatically increases compatibility with older PC games that don’t natively support the DualShock 4’s layout.


    Key Takeaways for Connecting

    System Connection Type Pairing Step Indicator of Success
    PS4 USB (Initial) Press the PS button. Solid colored light bar.
    PC USB (Wired) None (Plug & Play) Windows notification (Device Connected).
    PC Bluetooth (Wireless) Hold Share + PS until white light flashes. Solid blue light bar.
  • Seamless Audio: The Ultimate Guide to Connecting AirPods to Your iPhone

    Seamless Audio: The Ultimate Guide to Connecting AirPods to Your iPhone

    Seamless Audio: The Ultimate Guide to Connecting AirPods to Your iPhone

    Connecting Apple AirPods to your iPhone is designed to be an almost magical, one-tap experience, unlike traditional Bluetooth pairing. This seamless process is powered by Apple’s W1 and H1 chips, which instantly recognise your device.

    Whether you’re setting up a brand-new pair or trying to reconnect after an issue, this step-by-step guide will get your wireless earbuds working in seconds.

    Phase 1: The Quick Connect (The Apple Magic)

    The easiest way to connect your AirPods (AirPods, AirPods Pro, or AirPods Max) requires your iPhone to have its Bluetooth turned on and be running the latest version of iOS.

    Step-by-Step Guide:

    1. Go to Your iPhone Home Screen: Ensure your iPhone is unlocked and you are on the Home Screen.

    2. Enable Bluetooth: Swipe down from the top right (or up from the bottom on older models) to open the Control Center and verify the Bluetooth icon is blue (On). If it’s off, tap it to turn it on.

    3. Prepare Your AirPods:

      • AirPods (All Generations) or AirPods Pro: Place both earbuds inside the charging case and open the lid.

      • AirPods Max: Simply take the headphones out of the Smart Case.

    4. Hold Near iPhone: Place the open AirPods case or the AirPods Max near your iPhone.

    5. Tap Connect: Within a few seconds, a setup animation will appear on your iPhone screen. Tap “Connect.”


    How to Permanently Delete Your Facebook Account

  • How to Permanently Delete Your Facebook Account

    How to Permanently Delete Your Facebook Account

    How to Permanently Delete Your Facebook Account


    Are you ready to say goodbye to Facebook for good? Whether you’re concerned about privacy, tired of the endless scrolling, or just want to declutter your digital life, permanently deleting your Facebook account is a significant step. This guide will walk you through the process, ensuring you understand the implications and how to back up your data before you go.

    Important Note: Deleting your Facebook account is irreversible. Once the deletion process is complete, you won’t be able to reactivate your account, retrieve any of your content, or access information you’ve shared. Consider downloading your data first!

    Step 1: Download Your Facebook Data (Optional, but Recommended!)


    Before you hit that delete button, you might want to save a copy of all the photos, posts, and information you’ve shared on Facebook over the years. This can include your posts, photos, videos, messages, and even information about your ads.

    1. Log in to your Facebook account.

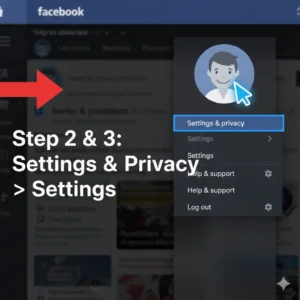
    2. Click on your profile picture in the top right corner.

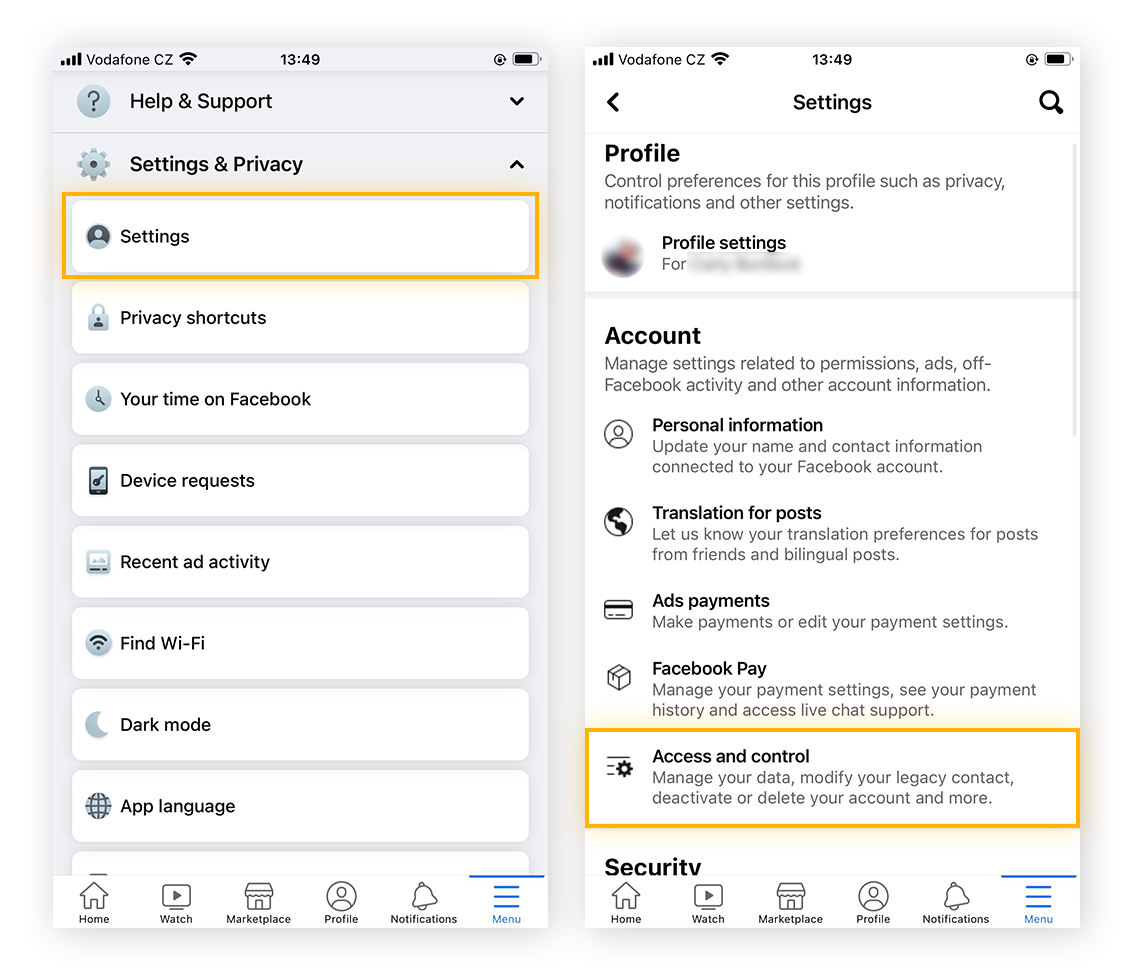
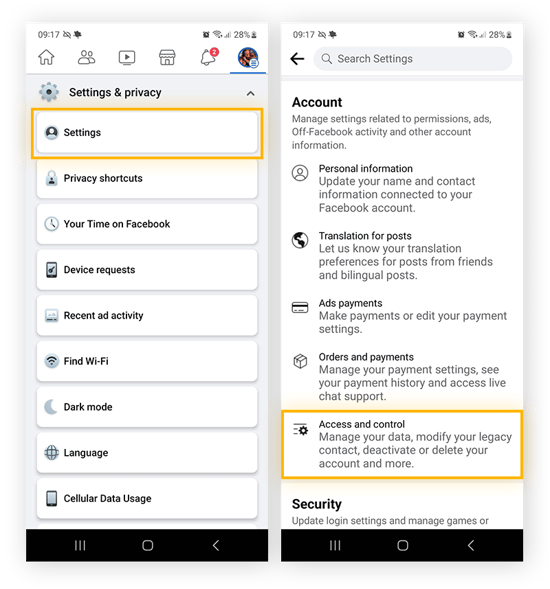
    3. From the dropdown menu, select “Settings & privacy”, then click “Settings.”

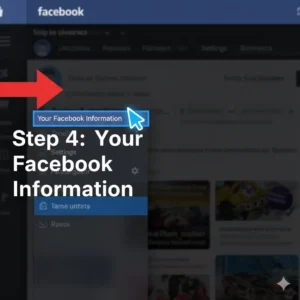
    4. In the left-hand menu, click on “Your Facebook information.”

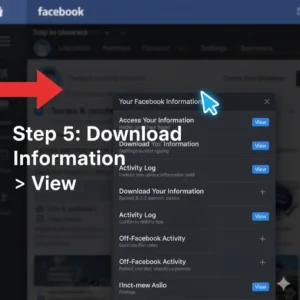
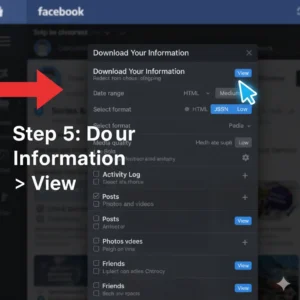
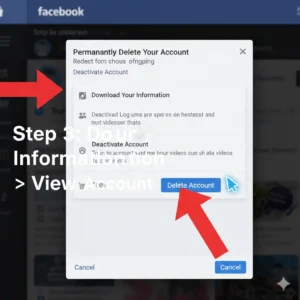
    5. Next to “Download Your Information,” click “View.”

    6. You can then select the date range, format, and quality of your download. Click “Create File” to begin the download process. It may take some time for Facebook to compile your data.

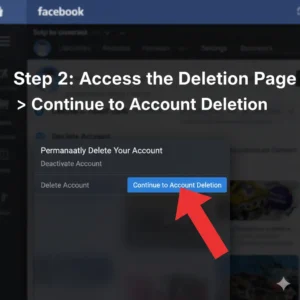
    Step 2: Access the Account Deletion Page


    Facebook doesn’t make the deletion option immediately obvious, but it’s there.

    1. While logged in, go to Facebook’s “Delete Your Account” page. You can find it by searching “delete Facebook account” in the help center, or directly by navigating to: https://www.facebook.com/help/delete_account

    Step 3: Confirm Permanent Deletion


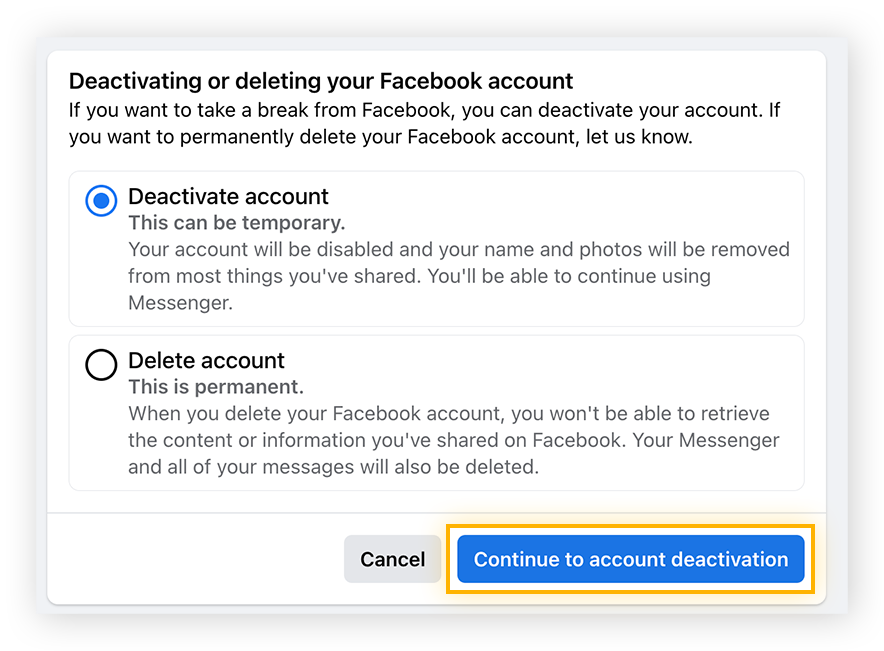
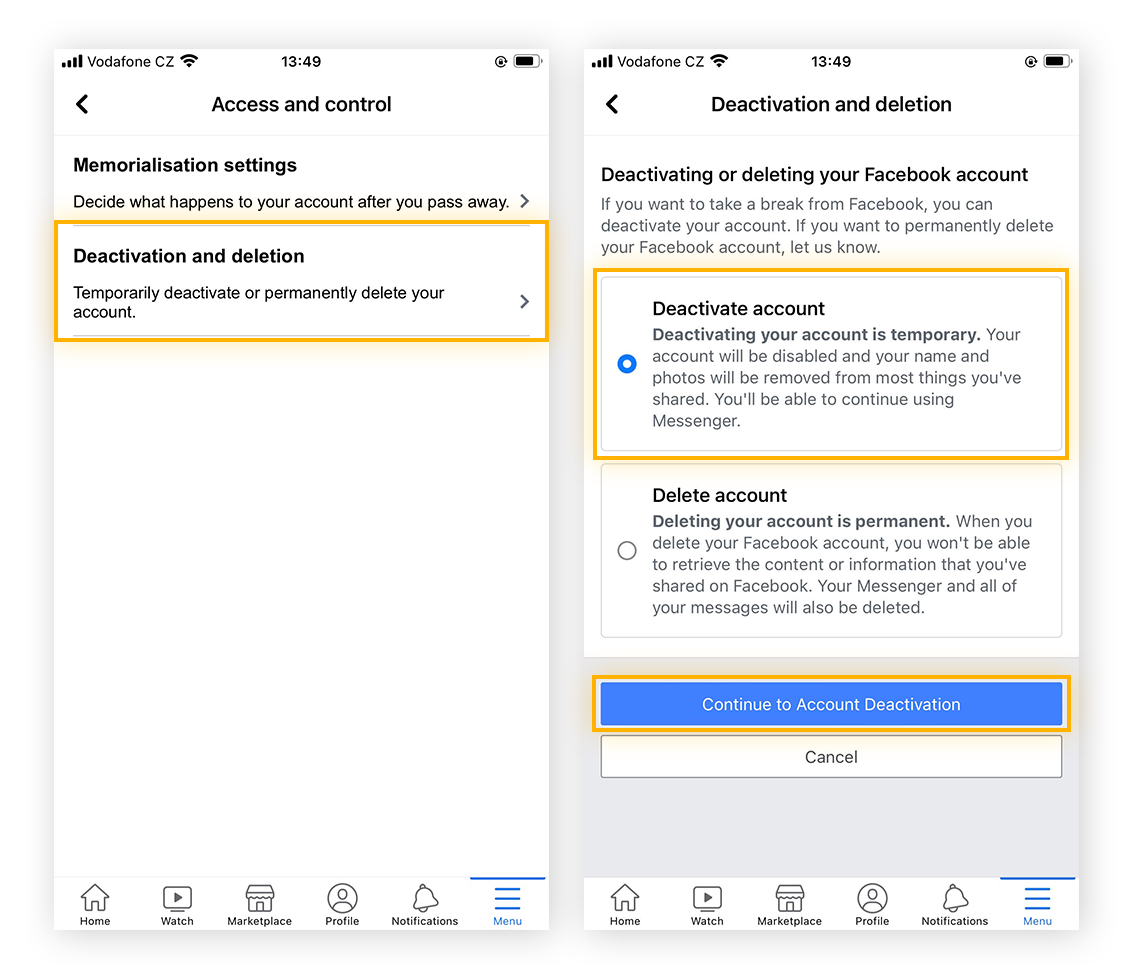
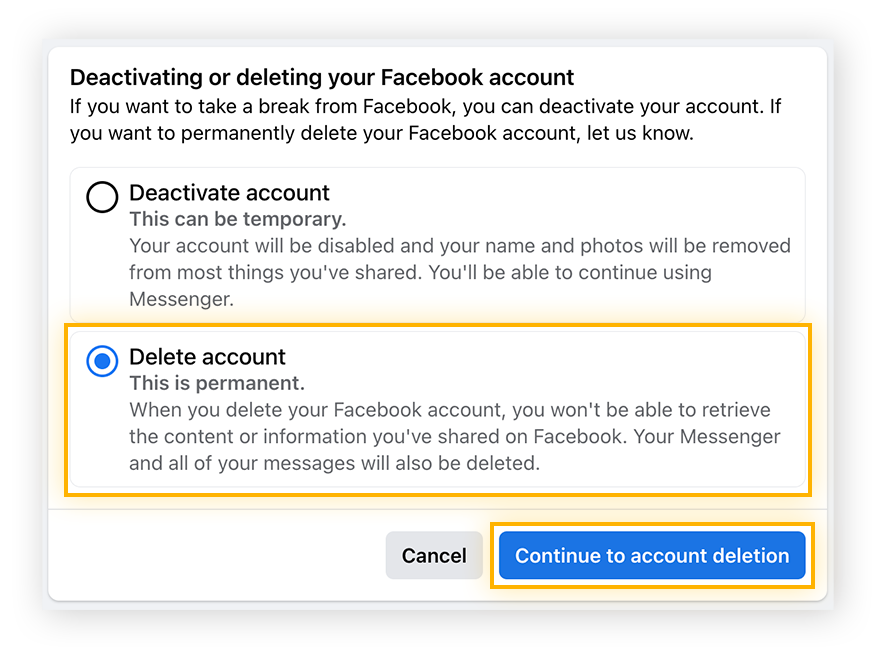
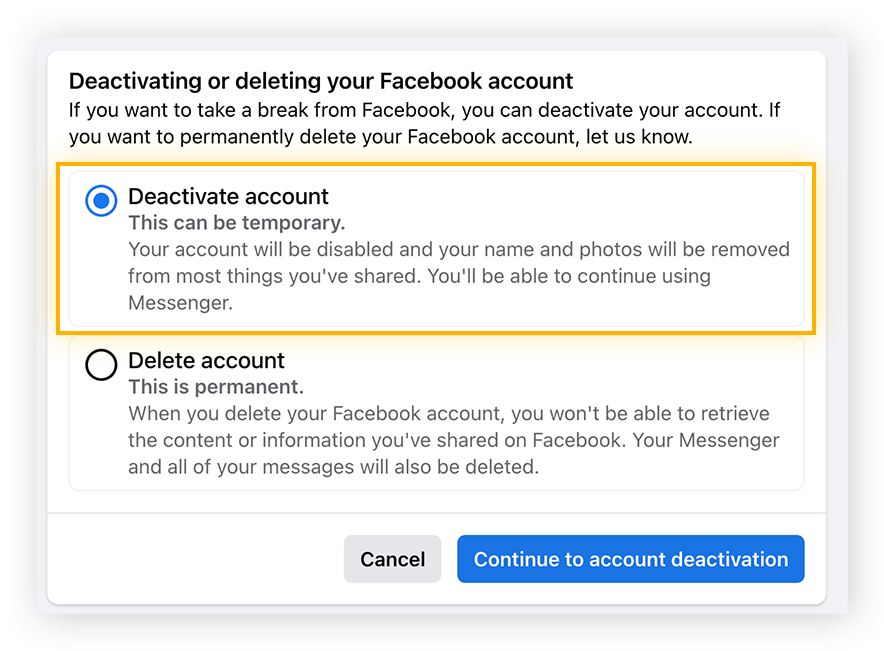
    On the “Delete Your Account” page, Facebook will try to offer you alternatives, such as deactivating your account (which is temporary and allows you to return) or downloading your information again.

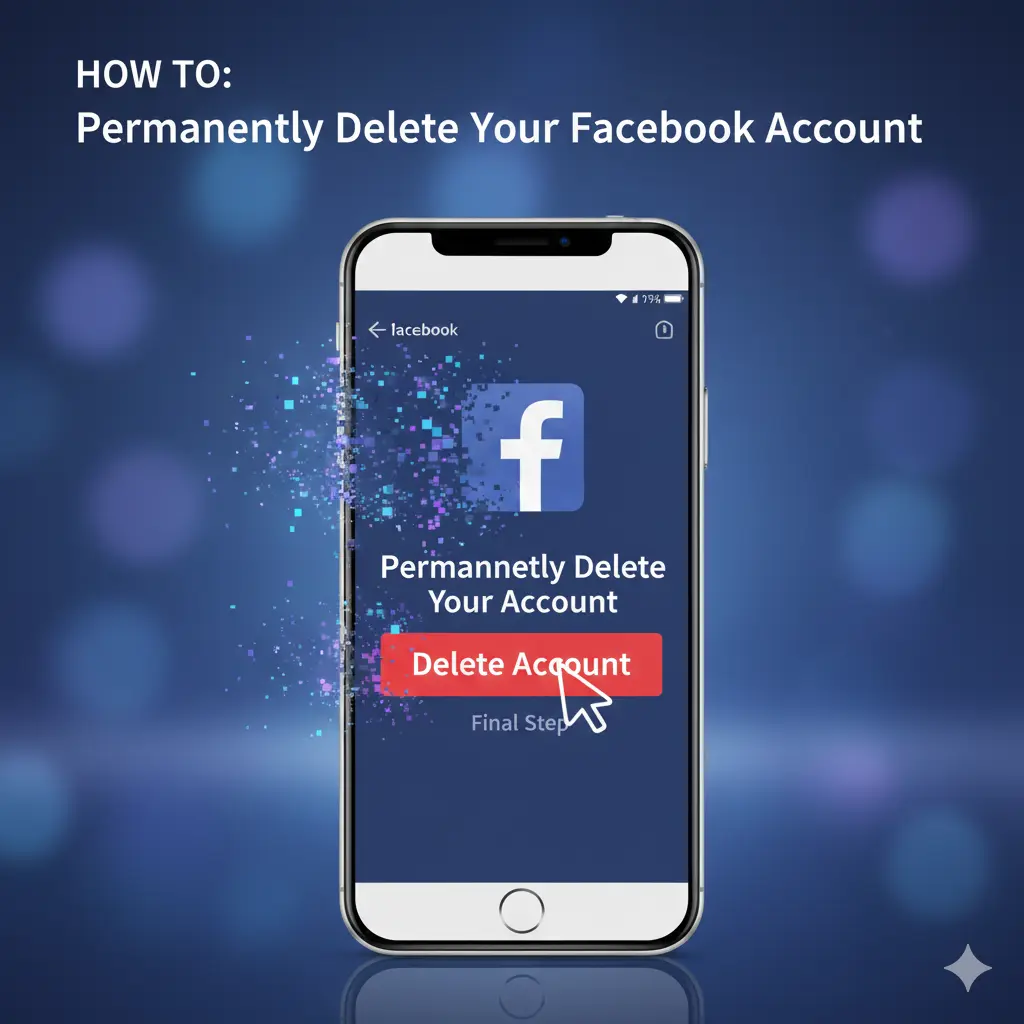
    1. Click the “Delete Account” button.

    2. You will be prompted to enter your password to confirm it’s you.

    3. Click “Continue.”

    Step 4: Your Account is Scheduled for Deletion


    After confirming, your account will be scheduled for permanent deletion, which typically takes 30 days. During this 30-day grace period, your account will be invisible to others on Facebook.

    Important: If you log back into your Facebook account at any point during these 30 days, the deletion process will be canceled, and your account will be reactivated. To proceed with deletion, you must avoid logging in for the entire 30-day period.

    What Happens After Deletion?


    • Your profile, photos, posts, videos, and everything else you’ve added will be permanently deleted.

    • You won’t be able to retrieve any of the content or information you’ve added.

    • It may take up to 90 days from the beginning of the deletion process to delete all the data stored in backup systems. While your information is being deleted, it is inaccessible to other people using Facebook.

    • Some information, like message history, may remain in other people’s inboxes if they still have their accounts.

    Congratulations! You’ve successfully taken the steps to permanently delete your Facebook account. Enjoy your new-found digital freedom!

  • How to Change a Tire: A Step-by-Step Guide for Drivers in 2025

    How to Change a Tire: A Step-by-Step Guide for Drivers in 2025

    Flat tires can happen anytime — on a quiet morning commute, a long road trip, or even right in your driveway. Knowing how to change a tire safely is a valuable skill every driver should have. This simple, step-by-step guide will walk you through the process so you can get back on the road quickly and safely.


    🔧 What You’ll Need


    Before you begin, make sure you have these essential tools:

    • Car jack

    • Lug wrench (tire iron)

    • Fully inflated spare tire

    • Vehicle owner’s manual

    • Wheel wedges or bricks (for safety)

    • Reflective vest and warning triangles (optional but recommended)


    🚗 Step 1: Find a Safe Location


    As soon as you notice a flat tire, slowly reduce your speed and look for a safe, flat area away from traffic. Avoid stopping on curves or narrow shoulders. Turn on your hazard lights and apply the parking brake.


    🧱 Step 2: Secure the Vehicle


    Place wheel wedges or heavy objects behind the tires opposite the flat one to prevent the car from rolling. If changing a rear tire, wedge the front wheels — and vice versa.


    🔩 Step 3: Loosen the Lug Nuts


    Use your lug wrench to turn the nuts counterclockwise. Don’t remove them completely yet — just break their resistance while the car is still on the ground.


    ⬆️ Step 4: Raise the Vehicle


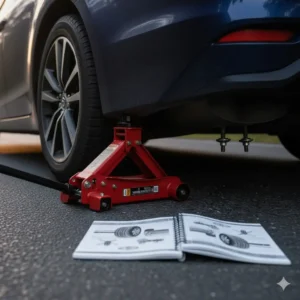
    Consult your vehicle’s manual to locate the correct jacking point near the flat tire. Carefully raise the vehicle until the flat tire is about six inches off the ground. Never crawl under the car while it’s raised.


    🛞 Step 5: Remove the Flat Tire


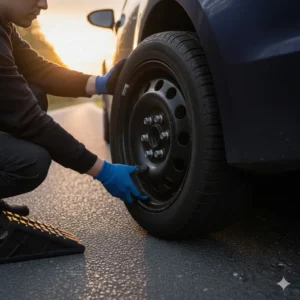
    Fully remove the loosened lug nuts and place them somewhere safe. Gently pull the tire straight off the wheel bolts.


    🔁 Step 6: Mount the Spare Tire


    Lift the spare tire onto the wheel bolts, lining up the holes carefully. Push until the tire sits flush against the hub. Replace the lug nuts by hand and tighten them slightly.


    🔧 Step 7: Lower and Tighten


    Lower the car until the spare just touches the ground. Then, tighten the lug nuts in a star pattern — one nut, then the one directly opposite — to ensure even pressure. Finish tightening once the car is fully lowered.


    ⚙️ Step 8: Check Your Work


    Give each lug nut a final check to ensure it’s secure. Stow your tools and the damaged tire safely in the trunk.


    🧭 Step 9: Drive Safely


    Spare tires, especially compact “donut” spares, are meant for short distances only — typically under 50 miles and no faster than 50 mph. Drive carefully and get the flat tire repaired or replaced as soon as possible.


    🛠️ Pro Tip: Prevent Future Flats

    • Check tire pressure monthly.

    • Inspect tread depth regularly.

    • Avoid potholes and debris on the road.

    • Rotate your tires every 5,000–7,500 miles.

  • How to Screenshot on Chromebook — Step-by-Step Guide (With Photos & Shortcuts)

    How to Screenshot on Chromebook — Step-by-Step Guide (With Photos & Shortcuts)

    📸 How to Screenshot on Chromebook (With Photos)

    Chromebooks make capturing your screen quick and easy — whether you’re saving notes, sharing an error message, or showing someone what’s on your display.
    Here’s a complete, easy-to-follow guide on how to take a screenshot on a Chromebook, with visuals and pro tips.


    🧭 1. How to Take a Full-Screen Screenshot

    Shortcut:

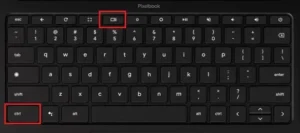
    Press Ctrl + Show Windows (⧉)

    Steps:

    1. Hold down the Ctrl key.

    2. Tap the Show Windows key (it looks like a rectangle with two lines on the right, usually above the number 6).

    3. Your screen will briefly dim — that means the screenshot has been captured.

    Your screenshot will automatically be saved in the Downloads folder and appear in the bottom-right corner of your screen for quick access.


    🧩 2. How to Screenshot a Specific Area

    Shortcut:

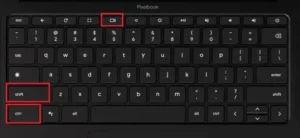
    Press Ctrl + Shift + Show Windows (⧉)

    Steps:

    1. Hold Ctrl + Shift, then press Show Windows.

    2. The cursor will turn into a crosshair.

    3. Click and drag to select the area you want to capture.

    4. Release to take the screenshot.


    🪟 3. How to Screenshot a Single Window

    Steps:

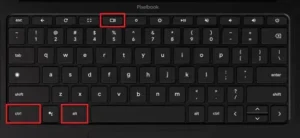
    1. Press Ctrl + Alt + Show Windows (⧉).

    2. Click on the window you want to capture.

    3. The Chromebook will take a screenshot of that window only.


    🧠 4. How to Take Screenshots Using the Screen Capture Tool

    If you prefer using your mouse or touchscreen:

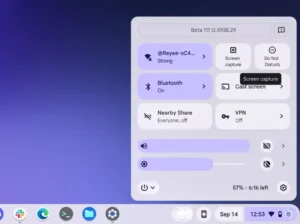
    1. Click the Clock in the bottom-right corner.

    2. Select the Screen Capture icon (a small camera).

    3. Choose between Screenshot or Screen Record, then select:

      • Full Screen

      • Partial Area

      • Window


    💾 5. Where to Find Your Screenshots

    All screenshots are saved automatically to your Downloads folder.

    To find them:

    • Open the Files app.

    • Go to the Downloads section on the left panel.

    You can also access recent screenshots by clicking the notification thumbnail that appears after taking one.


    ✏️ 6. How to Edit or Annotate a Screenshot

    After you take a screenshot:

    1. Open it from the preview notification or Files app.

    2. Click the Edit (✎) icon.

    3. You can crop, rotate, draw, or highlight your screenshot before saving.


    ⚙️ 7. Pro Tips for Chromebook Screenshots

    • Press Ctrl + P to print or convert your screenshot to PDF.

    • Press Ctrl + Z to undo if you make a mistake while editing.

    • Use Google Drive to back up screenshots automatically.

    • You can also say, “Hey Google, take a screenshot” if Google Assistant is enabled.


    🧾 Common Questions (FAQ)

    Q1: Where do Chromebook screenshots go?
    A: They’re saved in the Downloads folder by default.

    Q2: Can I change the screenshot location?
    A: Yes. Open the Screen Capture tool → Gear icon → Select Save to → Choose a new folder.

    Q3: How to take a screenshot on Chromebook without the keyboard?
    A: Use the on-screen Screen Capture tool from the Quick Settings menu.

  • Mastering uBlock Origin for an Ad-Free and Enhanced YouTube Experience

    Mastering uBlock Origin for an Ad-Free and Enhanced YouTube Experience

    Are you fed up with disruptive ads ruining your YouTube experience? You’re not alone. Thankfully, the perfect solution for uninterrupted, ad-free YouTube viewing is uBlock Origin YouTube. This powerful and lightweight browser extension blocks intrusive ads, pop-ups, and trackers, offering a faster, smoother, and more enjoyable video-watching experience.

    In this ultimate guide, we’ll walk you through setting up uBlock Origin YouTube, troubleshooting common issues, and optimizing its settings for peak performance. Plus, we’ll share the latest updates on YouTube’s evolving ad strategies and how to keep uBlock Origin ahead of the game. If you’re dealing with persistent ads or video loading issues, this guide has you covered. Let’s dive in and reclaim your ad-free viewing experience!


    What is uBlock Origin and How Does It Work on YouTube?

    uBlock Origin

    It is one of the most efficient and popular ad blockers available. It enhances your YouTube experience by using advanced filters and rules to block unwanted content. Let’s break down how it works:


    Managing Web Content

    uBlock Origin actively applies a variety of filter lists to decide which content to block or allow. These filter lists serve as databases of rules, guiding uBlock Origin on how to handle different types of requests—like ads, trackers, and scripts—when you visit a webpage.

    Filtering Process

    Request Analysis: When you load a page like a YouTube video, uBlock Origin actively inspects every network request tied to that page. This covers requests for images, scripts, and video ads.
    List Matching: uBlock Origin checks each request against the rules in its active filter lists. It blocks any request that matches a blocklist rule and allows those matching an allowlist rule to proceed.
    Blocking Actions: When uBlock Origin blocks a request, it stops related elements—like a YouTube pre-video ad—from loading. This eliminates the ad and often speeds up the page’s loading time.


    Dynamic Filtering

    Beyond relying on static filter lists, uBlock Origin empowers advanced users to craft custom rules through dynamic filtering. This feature lets you block or allow content tailored to your browsing preferences, proving especially handy on YouTube for tackling unique situations where standard filters fall short.


    Cosmetic Filtering

    uBlock Origin enhances your experience with cosmetic filtering, actively erasing the empty spaces or visual leftovers from blocked content. On YouTube, it ensures that even when an ad gets blocked, any blank spots or placeholders vanish, delivering a smoother, cleaner viewing experience.


    Effect on YouTube

    • Halts pre-roll ads, mid-roll ads, and other video advertisements.
    • Clears banner ads from the YouTube interface.
    • Prevents trackers embedded in the YouTube page from loading, boosting your privacy.

    Why uBlock Origin Might Not Be Working on YouTube

    Sometimes, It  doesn’t block YouTube ads perfectly. Let’s explore the most common reasons:

    1. YouTube’s Evolving Ad Strategies

    YouTube frequently updates its ad delivery scripts to bypass ad blockers. Recently, YouTube has started using server-side ad insertion (SSAI), making it harder for ad blockers to intercept ad content.

    2. Outdated Filter Lists

    Old or outdated filter lists might not recognize new ad formats. Regular updates ensure effective ad blocking.

    3. Cached Data and Cookies

    Cached data can interfere with uBlock Origin’s ability to update and apply new filters.

    4. Conflicting Browser Extensions

    Other extensions, like VPNs or additional ad blockers, can conflict with uBlock Origin’s functionality.

    5. Incorrect Custom Filters

    Manually added filters can become outdated or incorrect, reducing uBlock Origin’s effectiveness.

    6. Advanced Ad Techniques

    YouTube sometimes embeds ads directly into the video stream, making them harder to detect and block.

    7. Outdated uBlock Origin Version

    An older extension version might lack the latest features and fixes needed for effective ad blocking.

    8. Browser Compatibility Issues

    Certain browsers, like Safari or some mobile browsers, limit uBlock Origin’s capabilities.

    9. Network-Based Ads

    Ads delivered through network-level methods, like ISP-level ads, are harder to block.

    10. Inconsistent Filter Updates

    If you don’t regularly update your filters, uBlock Origin’s performance will decline over time.


    How to Fix uBlock Origin When It’s Not Working on YouTube

    If uBlock Origin isn’t blocking YouTube ads properly, follow these steps to restore its efficiency:

    1. Update Filter Lists

    Keeping filter lists up to date is essential:

    • Open the uBlock Origin dashboard.
    • Go to the “Filter Lists” tab.
    • Click “Purge all caches” and then “Update now”.

    Filter Lists

    2. Add YouTube-Specific Filters

    Enhance ad blocking by adding custom YouTube filters:

    • Go to the “My filters” tab.
    • Add filters specifically targeting YouTube’s ad servers. You can find these rules on forums like Reddit and GitHub.

    3. Update Extension

    Ensure you’re using the latest version:

    • Go to your browser’s extension store.
    • Check for updates and install if available.

    4. Disable Conflicting Extensions

    Other extensions can interfere with uBlock Origin:

    • Review your installed extensions.
    • Temporarily disable other ad blockers or VPNs to see if uBlock Origin improves.

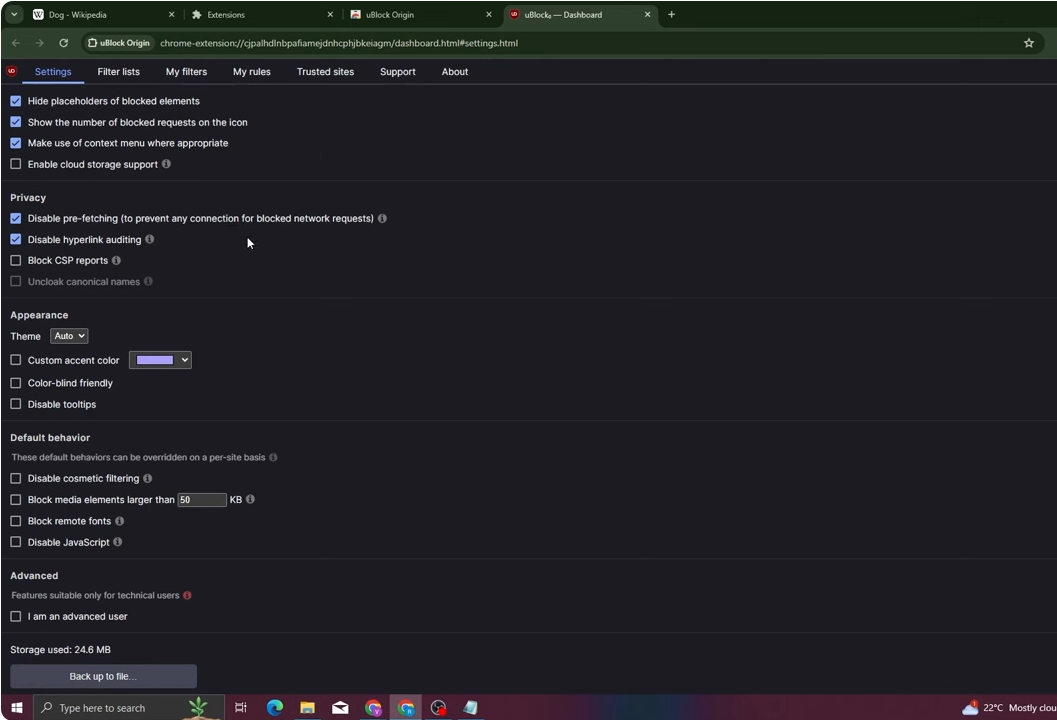
    5. Adjust Origin Settings

    Fine-tune the extension’s settings:

    • Go to the “Settings” tab.
    • Enable advanced blocking options like blocking large media elements and obfuscated scripts.

    Origin Settings

    6. Try Alternative Ad Blockers

    If uBlock Origin still struggles, consider these powerful alternatives:

    Ad Blockers

    AdBlock Plus

    • Compatible with Chrome, Firefox, and Edge.
    • Customizable filter lists.
    • Blocks YouTube video ads and banners.

    AdGuard

    • Works on Windows, Mac, iOS, Android, and browsers.
    • Advanced filtering for video ads and trackers.
    • Available as a standalone app or extension.

    7. Switch Browsers

    uBlock Origin often performs better on Chrome or Firefox compared to Safari and other browsers.

    8. Enable Advanced Mode

    For more control over filtering:

    • Open the uBlock Origin dashboard.
    • Activate “I am an advanced user”.
    • Use dynamic filtering to create custom rules for YouTube.

    Alternative Solutions for Ad-Free YouTube

    If it doesn’t fully meet your needs, consider these alternatives:

    1. YouTube Premium

    • Ad-free videos.
    • Background playback.
    • Offline downloads and exclusive content.

    2. Ad-Blocking Browsers

    • Brave: Built-in ad blocker and rewards system.
    • Opera: Includes a free VPN and integrated ad-blocking.

    Conclusion: Enjoy YouTube Without Ads

    Optimizing <strong>uBlock Origin YouTube for ad-free video streaming involves updating filters, adjusting settings, and occasionally troubleshooting conflicts. Staying aware of YouTube’s evolving ad techniques, like server-side ad insertion, ensures you can keep your ad blocker effective. By following this guide, you’ll enhance your viewing experience and block intrusive ads efficiently.

    With the right setup, you can enjoy a cleaner, faster, and ad-free YouTube experience. So why wait? Take control of your screen today!


    Curious about TikTok vs. Rednot? Click here to explore the ultimate showdown!

  • Convert YouTube Videos to MP4 latest tool in 2025

    Convert YouTube Videos to MP4 latest tool in 2025


    Whether you’re saving a tutorial for offline viewing, preserving a favorite music video, or creating a personal archive, converting YouTube videos to MP4 is a popular solution. This guide will walk you through everything you need to know about converting YouTube videos to MP4 files, catering specifically to users in the United States.

    Why Convert YouTube Videos to MP4?

    1. Offline Accessibility: Download your favorite videos to watch anytime, anywhere, without relying on an internet connection.
    2. High Compatibility: MP4 is one of the most universally supported video formats, compatible with almost all devices and media players.
    3. Preserve Quality: Enjoy HD or even 4K content without buffering issues.
    4. Easy Sharing: Share MP4 files with friends, family, or colleagues through USB drives, cloud storage, or email.


    How to Convert YouTube Videos to MP4

    Converting YouTube videos to MP4 is a straightforward process, especially with reliable tools like SaveFrom.net. Follow these steps:

    1. Find the Video: Navigate to YouTube and copy the URL of the video you want to convert.
    2. Visit SaveFrom.net: Open SaveFrom.net’s YouTube to MP4 converter.
    3. Paste the URL: Paste the copied YouTube link into the input box on the SaveFrom.net page.
    4. Select MP4 Format: Choose your desired video resolution and format (MP4 is the default option).
    5. Download: Click the download button, and your video will be saved as an MP4 file on your device.


    Tips for Safe and Efficient Conversion

    • Use Trusted Websites: Stick to reputable platforms like SaveFrom.net to avoid malware or unreliable downloads.
    • Check File Size: High-quality videos have larger file sizes. Ensure you have sufficient storage space on your device.
    • Respect Copyright: Only download videos you own or have permission to use.


    Frequently Asked Questions

    Q: Is it legal to convert YouTube videos to MP4? A: Converting videos for personal use is generally allowed, but downloading copyrighted content without permission violates YouTube’s terms of service.

    Q: Can I convert videos on mobile devices? A: Yes! SaveFrom.net works seamlessly on both desktop and mobile browsers.

    Q: Are there any quality losses during conversion? A: The quality depends on the original video and the resolution you select during conversion.


    Conclusion

    Converting YouTube videos to MP4 is a convenient way to ensure your favorite content is accessible whenever and wherever you need it. With user-friendly tools like SaveFrom.net, the process is quick, safe, and efficient. Start converting your favorite videos today and enjoy the ultimate offline viewing experience!

    For more tips and tools, bookmark this page and share it with your friends!

    Explore more exciting Articles & Hows to ->